


Mastering High-Quality Audio Recording Techniques
- Anton Gromov
- Aug 2
- 4 min read

Creating clear, professional-sounding audio is a vital skill for anyone who wants to engage an audience effectively. Whether you're a podcaster, musician, or content creator, mastering audio recording techniques can elevate your projects significantly. This post delves into key principles that will help you achieve impeccable audio quality.
Audio Recording Tips
When it comes to recording audio, the environment you choose can have a significant impact on the final result. Aim for a space with minimal background noise. Look for carpets, curtains, or soft furniture, which can absorb sound and reduce echoes. If possible, use a dedicated room for recording.
Also, consider using acoustic panels or foam to treat walls. These materials can minimize unwanted sounds, providing a cleaner recording. If you're recording in a less-than-ideal environment, try to isolate yourself as much as possible. You can even use blankets to create a makeshift sound booth around your microphone.
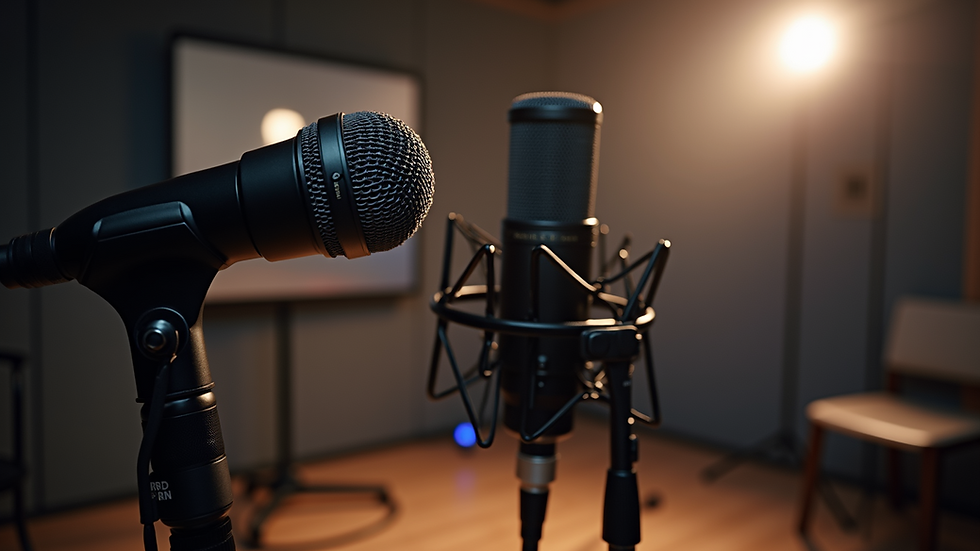
Investing in quality equipment is crucial. A good microphone will capture your voice more accurately than a low-cost option. Condenser microphones are often recommended for vocals, while dynamic microphones work well for instruments, thanks to their durability and ability to handle high sound pressure levels. Research and choose a microphone that suits your specific needs.
In addition to a high-quality microphone, consider using an audio interface. This device converts analog signals into digital data that your computer can process. Features like phantom power for condenser mics and low latency for monitoring are essential when recording.
Techniques for Better Audio Quality
The placement of your microphone plays a major role in capturing high-quality audio. A common mistake is placing the microphone too far from the sound source. Ideally, position the mic about 6-12 inches away from your mouth or the instrument you're recording. Experiment with angles and distances to find the best sound for your specific situation.
Be mindful of your recording levels. Aim for a sound level that peaks around -10 to -6 dB to avoid distortion. You can adjust the gain on your audio interface to ensure the sound isn't too quiet or too loud. Always double-check your levels before hitting the record button.
Utilizing a pop filter can vastly improve vocal recordings. This simple device helps to diffuse plosive sounds created by letters like "P" and "B." It acts as a barrier between you and the microphone, resulting in a cleaner sound without unwanted pops.
What is the Best Quality for Audio Recording?
When discussing audio quality, it’s crucial to understand the different sample rates and bit depths you can choose when recording. The sample rate refers to how many times per second your audio is sampled. Higher sample rates yield better sound quality, but they also require more disk space and processing power.
Professional-quality audio typically uses a sample rate of 48 kHz or 96 kHz. Most music is recorded at 24-bit depth, allowing for a more extensive dynamic range. Remember that higher quality means larger file sizes, so ensure your equipment can handle the increased demands.

Before you start recording, set up a checklist. This ensures you don’t forget any important steps, such as testing your microphone, checking levels, and ensuring your recording software is functioning correctly. Preparing beforehand can save you time and frustration, and it allows you to focus solely on your performance during recording.
Post-Production Adjustments
Post-production can significantly enhance the quality of your recording. After you finish recording, take the time to edit your audio. Software like Audacity or Adobe Audition provides powerful tools for cleaning up your audio tracks.
Start by removing any background noise. Most digital audio workstations (DAWs) have noise reduction plugins that help with this process. Next, you may want to adjust the levels of different tracks, ensuring that your voice stands out above any other sounds.
Consider adding compression to your audio, which evens out the volume levels. This technique ensures quieter passages are audible while preventing overly loud segments from causing distortion. Typically, settings such as a 3:1 ratio and threshold around -15 dB work well for voice recording.
Finally, it’s worth exploring equalization (EQ) to enhance the clarity and professionalism of your audio. Attempt to boost the frequencies where your voice sounds the best, often around 3 kHz to 5 kHz while lowering frequencies that can make the audio sound muddy.
Final Thoughts on Audio Recording
Mastering high-quality audio recording techniques involves a combination of the right environment, equipment, and post-production. With careful planning and execution, you can record audio that captivates your audience. Remember to continuously experiment and refine your approach over time; there's always something new to learn.
For those eager to dive deeper into the world of high-quality audio recording techniques, participating in workshops and tutorials can be invaluable. Engaging with communities can also help you improve and expand your skills.

With dedication and practice, you'll be well on your way to mastering your audio recording skills, leading to better content and an enhanced listening experience for your audience. Happy recording!


Comments